

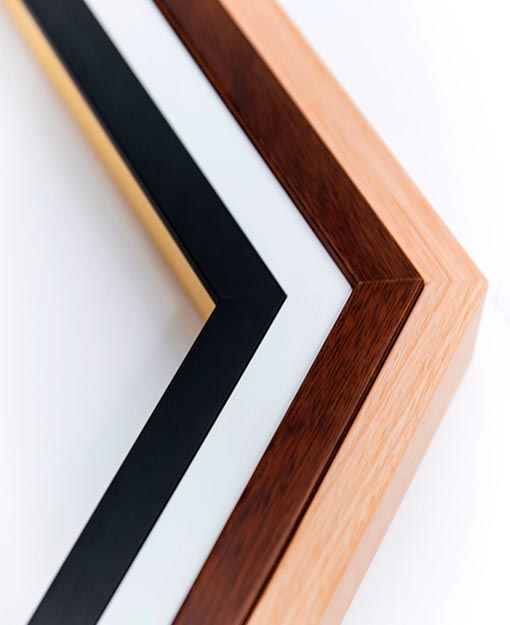
There’s something deeply satisfying about hanging a photo or piece of art in a frame you built with your own two hands. Store-bought frames are convenient, sure, but they rarely fit your vision perfectly, and they almost never feel personal. If you’ve ever wondered whether you have what it takes to make your own, the answer is a resounding yes, and this guide will show you exactly how.
How do you build a picture frame?
To build a picture frame, measure your artwork, cut four wood pieces at 45-degree angles to match the desired dimensions, and sand the edges smooth. Apply wood glue to the mitered corners, clamp them together, and reinforce with corner brackets or nails. Finish with stain or paint, then add glass, backing, and hanging hardware.
Why Build Your Own Frame Instead of Buying One?
Custom-sized artwork almost never fits standard frame dimensions. Building your own means you control the size, the wood species, the finish, and the overall style down to the last detail.
There’s also a cost factor. Custom framing at a shop can get expensive fast, especially for larger pieces or oddly-shaped canvases. A DIY frame, once you’ve invested in basic tools, becomes noticeably cheaper with every project after the first.
- Full creative control over color, wood type, and width
- Cost savings on larger or custom-sized pieces
- Personal satisfaction from a handmade result
- Skill building that transfers to other woodworking projects
Tools and Materials You’ll Actually Need
You don’t need a professional workshop to get started, but a few key tools will make the process much smoother and safer.
Essential Tools
- Miter saw or miter box with hand saw
- Wood glue (a strong, quick-drying variety works best)
- Clamps, preferably a corner or frame clamp
- Sandpaper (medium and fine grit)
- Measuring tape and pencil
- Nail gun or hammer with small finishing nails
Materials
- Wood molding of your choice
- Glass or acrylic sheet
- Backing board (foam core or thin plywood)
- Hanging hardware (D-rings, wire, sawtooth hangers)
- Stain, paint, or clear finish
One decision that quietly determines how your finished frame will look and hold up over time is the wood itself. Some species are easier to cut cleanly, others resist warping better, and some simply look more elegant depending on the artwork you’re framing. If you’re unsure where to start, this guide on choosing the perfect framing wood breaks down which options hold up best over the years and why that matters more than people expect.
Step-by-Step: Building Your Frame
Step 1: Measure Your Artwork
Measure the exact width and height of what you’re framing. Add a small margin, usually an eighth of an inch on each side, so the piece slides in without resistance.
Step 2: Choose Your Molding
Pick a wood molding profile that complements the artwork. Thin, simple profiles suit modern prints, while wider, ornate moldings work better for classic or vintage pieces.
Step 3: Cut the Angles
Using a miter saw, cut each piece at a 45-degree angle so the corners will meet seamlessly. Double-check measurements before every cut since wood cannot be un-cut.
Step 4: Dry Fit Everything
Before applying any glue, assemble the four pieces to confirm they form a clean, square rectangle. This step saves you from gluing a mistake into place.
Step 5: Glue and Clamp
Apply wood glue to each mitered edge, join the corners, and secure with clamps. Let the frame dry fully, usually a few hours, before moving on.
Step 6: Reinforce the Corners
Add small nails or corner brackets for extra strength once the glue has cured. This prevents the joints from loosening over time.
Step 7: Sand and Finish
Sand any rough spots, then apply your chosen stain, paint, or sealant. Allow it to dry completely before handling further.
Step 8: Add Glass and Backing
Insert the glass or acrylic, place your artwork, add the backing board, and secure everything with small nails or turn clips.
Step 9: Attach Hanging Hardware
Finish by adding D-rings and wire, or a sawtooth hanger for lighter frames, so your piece is ready to display.
Common Mistakes Beginners Make
Even simple projects can go sideways without a bit of foresight. Here are the pitfalls that trip up most first-timers.
- Rushing the measurements: A small error compounds across four cuts and ruins the fit.
- Skipping the dry fit: Gluing crooked corners is far harder to fix than catching the issue early.
- Using too much glue: Excess glue seeps out and creates a messy, uneven joint.
- Ignoring wood grain direction: This affects both appearance and how the wood reacts to humidity over time.
- Not sanding before finishing: Rough edges show through paint and stain, ruining the polished look.
Choosing a Style That Matches Your Space
Frames aren’t just functional, they’re part of your room’s overall design language. A slim black frame feels modern and minimal, while a distressed wood frame leans rustic or farmhouse. Wide, ornate frames tend to suit formal spaces or heirloom photographs.
Think about the room where the piece will hang before finalizing your wood choice and finish. Matching tones with existing furniture creates a cohesive look, while contrasting frames can make artwork pop as a standalone statement piece.
Modern Spaces
Slim profiles, black or natural wood, matte finishes
Rustic Spaces
Distressed wood, wider profiles, warm tones
Formal Spaces
Ornate detailing, gold or dark stained finishes
Tips for a Professional-Looking Finish
- Always sand between coats of stain or paint for a smoother final look
- Use painter’s tape to protect the glass area while finishing the wood
- Let each layer dry fully rather than rushing to the next step
- Wipe away excess glue immediately with a damp cloth
- Test your finish on a scrap piece of the same wood first
Final Thoughts
Building your own picture frame is one of those projects that rewards you well beyond the time you put into it. You get a custom fit, a finish that matches your taste, and a genuine sense of accomplishment every time you look at the finished result. Start small, take your time with measurements, and don’t be afraid to experiment with different wood types and finishes as you gain confidence.
With the right tools and a little patience, you’ll find that framing your own artwork isn’t just achievable, it’s genuinely enjoyable.
Frequently Asked Questions
Do I need a miter saw to build a picture frame?
A miter saw makes the job easier and more precise, but a miter box paired with a hand saw works fine for beginners on smaller projects.
What’s the best wood for a beginner frame project?
Pine is affordable and easy to cut, making it a solid choice for first-timers, while oak or maple offer more durability for advanced builders.
How long does it take to build a frame from start to finish?
Most simple frames take two to three hours of active work, though drying time for glue and finish can extend the full process to a day or two.
Can I build a frame without nails?
Yes, strong wood glue combined with corner clamps can hold a frame securely, especially for lighter artwork.
What size should I add for the artwork to fit inside the frame?
Add roughly an eighth of an inch of clearance on each side so the piece slides in smoothly without being too loose.

